
Newsletter 13
Computer Use & Patterns
2007 Copyright Sue Walters
To start with, you'll need to have what is known as 'imaging software'. This is just a fancy name for a software program that is used to manipulate digital images. There are absolutely tons of these programs around...some can be bought but often you get them bundled with a digital camera or scanner. If you don't have an imaging program or aren't keen on the one you do have, you can try this quality program for free. I'm going to use the IrfanView for this tutorial, just so we're all on the same page. You'll find however that most of the imaging programs out there use similar terminology.
.

Step 1: To manipulate a pattern from a book for use in a computer, you will need to scan the picture on a scanner bed, import it to your computer and save the image as a digital file.
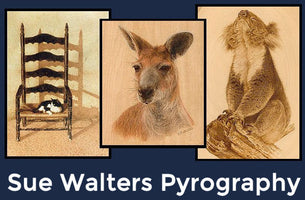
Insert shameless self promotion: The image we are using today is from my own pattern book
by Sue Walters. End shameless self promotion:)
.
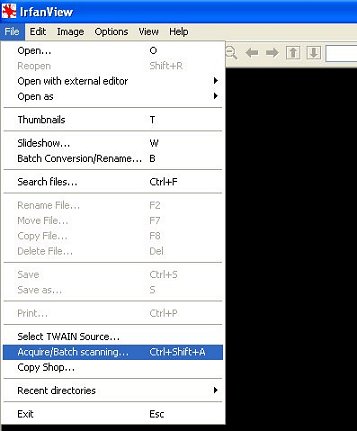
Step 2: Place the book in the scanner bed, open your imaging software and choose 'Acquire/Batch Scanning' from the 'File Menu'. In the window that opens, choose, 'Single Image' and click okay. Your scanner software should open and you can then scan the picture as you normally would. If you want a very sharp pattern image you should scan at 200-300dpi. Scanning at 75dpi will result in a picture than looks good on a computer screen but won't print sharply. If you scan a small pattern and wish to enlarge it, you should scan at a higher resolution IE: 300dpi so that the image will appear sharp once enlarged.
.

Step 3: If the program can't find your 'TWAIN Device' or 'driver' you may have to ask the program to look for the one you have connected to your computer. To do this choose 'Select Twain Source' from the 'File' menu. (TWAIN basically means your scanner equipment.) In the list that opens, select the scanner you have connected and want to use. (If you can't see it, make sure it's plugged in and switched on.) Once this is done, try acquiring the image again.
Of course, you can also acquire a digital pattern from a CD disc or other means. These images are already in digital format. To import such an image into Irfanview, choose 'Open' from the 'File' menu. A browser window then opens where you can search for and choose the image that you want. That image can then be manipulated just like a scanned one.
.

Step 4: After your pattern has been scanned, the image will open up in the Irfanview program, as seen above.
.

Step 5:If your image doesn't appear the right way up, you can rotate it if you wish. To do this choose 'Rotate Right', (or left) from the 'Image' menu. You will also notice that you can choose 'Custom Rotate' and 'Flip' options for your images.
.

Step 6: Now it's time to resize the image to suit your project. I measured my project with a ruler and I determined that I wanted the pattern to be 6.5 inches wide.
.

Step 7: To resize your image choose 'Resize/Resample' from the 'Image' menu.
.

Step 8: Clicking 'Resize/Resample' will open the resize window. For the purpose of my project I know I want my pattern 6.5 inches wide, so I check the radio button, 'Inches' and will type in, '6.5' in the 'Width' box. If 'Preserve Aspect Ratio' is selected the height of the image will be automatically re-sized in relation to width chosen, and visa versa. The height of your pattern may be more relevant to your project so you may wish to type your measurements in the 'Height' box first.
.

Step 9: Often after re-sizing the image might appear a little blurry. You can sharpen up the image by choosing 'Sharpen' from the 'Image' menu.
.

Step 10: Don't worry if you make a mistake along the way, most programs have a handy 'Undo' feature that lets you undo the previous step. To 'Undo' something in IrfanView, choose 'Undo' from the 'Edit' menu.
.

Step 11: It's now time to print out our pattern, but before you do that, let's save the image. This not only saves the work you have just done, but the resulting digital file can then be used in future projects. To save your image, choose 'Save As' from the 'File' menu. From the resulting window, select the location you wish to store the file, the name you wish to call the file and the type of file you want to save it as. JPG, (Jpeg), is the most common format and will do nicely for this pattern.
To print the image, choose 'Print' from the 'File' menu.
.
Step 12: Choosing 'Print' will open the 'Print Preview' window. There are various options here but, to prevent your pattern size from being distorted, be sure to choose 'Original Size' from the 'Print Size' option. Once you have selected any other print options you wish, choose 'Print' to print a hard copy of your pattern.
.

Step 13: From the resulting print out: 1)Trim away the excess paper 2)Place your pattern in place 3)Tape it down to prevent movement 4)Place graphite paper between the pattern and the object 5)Trace the pattern with a contrasting coloured pen or pencil.
.