
Newsletter 19
Hi:) I really appreciate you reading my monthly...errr...bimonthly?...okay...maybe biyearly newsletter. Yep, as per usual my desire to educate outweighs my actual ability to find the time to educate. But, I continue to punch above my weight...and with that I present the 20th Edition of the Pyro News.
In this edition I explain the concept of, what I call, negative burning. I just love the high contrast, art deco qualities of this technique and I can't wait to try some more myself.
To fully introduce this concept I have video taped the creation of the negative project, 'Burning Night'. I have also made a short, free pyro snippet that is available on YouTube...and for those of you who can't access YouTube or prefer the printed word, (and print out), I am presenting the concept in this newsletter.
As always, I hope you gain some inspiriation from the newsletter and that your holiday period is a safe, peaceful and happy one.
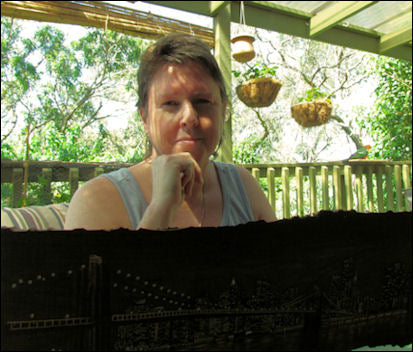
Regards from Oz,
Sue:)
Burning Night - The Art of Negative Burning

'Burning Night' - Negative Burning on poplar slab.
I started experimenting with what I call, 'Negative Pyrography' way back in 2002. I decided to burn some pine frames entirely black and then see if I could use a burr to etch away the various layers of black...to make a picture from the pine colour that lay beneath the burnt surface.
Normally a pyrographic piece is made in the 'positive'...the subject is burnt dark on a lighter 'canvas'. With my negative experiments I was focused on the opposite. I was trying to create a burnt image by revealing various shades of light tone from under a burnt dark background.
The art of scratchboard uses a similar approach. The board is made up of two colours; the white underlying colour covered by a black surface pigment. The image is made by revealing parts of the white under colour.

Giraffe on scratchboard. In progress.
This giraffe is being scratched away on a piece of scratchboard. It's a piece I started long ago but haven't found time to finish. It does give you an idea, however, of the negative process...where a picture is formed by revealing the light elements, as opposed to building the dark elements.
With my pine frame experiments I was initially surprised at how subtle the tone shifted the deeper I travelled through the burnt layer. You have to imagine, the deeper I travel through the burnt surface, the more raw pine I expose...the more pine I expose, the lighter the colour. This means that the lightest tone of my picture would have to be entirely exposed raw pine, the lightest tone I could achieve.

For instance, in this first experiment of mine, the shoulder blades of the back are the lightest part of the subject; hence they are the most heavily engraved, exposing the unburnt raw pine. The valley of the spine lays in dark shadow so, that part of the body is left untouched, leaving it the original colour of the burnt surface. All other tones in between lightest and darkest have been engraved to some extent.
The ability to gradually remove layers allowed me to create pieces that were highly realistic but I did realize that this process is fairly exacting and would be an artistic stretch that some people would struggle with. I decided, at that time, to shelve the idea of doing any tutorials on this technique until I could simplify matters.

A little time passed and then I was presented with the challenge of making a present for a friend of mine who had just returned from a visit to NYC. I decided to revisit the negative burning idea and burn a frame depicting the NYC skyline and the Brooklyn Bridge, as seen at night time. This time the technique I used was a lot simpler and I realized that even a novice could manage it. This was a technique I could teach and promised myself I would one day soon.
Errr...ahem...fast forward about 10 years, to present day. What can I say? As people who receive my 'monthly newsletters' can attest to, things never move as quickly as I'd like them to. I can only hope my biyearly/monthly newsletter is appreciated and that I am forgiven for constantly piling my creative plate way too high. I can't promise I will change, but I can promise whatever I do deliver is done to the best of my ability.
So, with that, I have finally managed the 6 months it takes to produce these DVDs...to do a video workshop on the exciting technique I call 'negative pyrography'. After my own visit to NYC how could I choose a better subject than the iconic Brooklyn Bridge and the New York City skyline? I call the DVD project, 'Burning Night'. It is 26 inches wide and burnt on natural poplar slab.
I know it can be incredibly difficult to get your head around the negative pyrography concept, but hopefully all will become clearer after reading the information below.
With positive burning an image is created by burning dark tones on a light background. With negative burning an image is created by revealing light material under a dark surface. When in doubt, think; dark on light is positive - light on dark is negative.

|
Comparing the Two
To more easily explain the difference between positive and negative I created the tutorial I call, 'Night and Day'. Imagine you are looking at an old house.
DAY: During the day the bricks, shutters and plants are illuminated by the daylight. Inside lies in darkness and you can only just make out the interior.
 Night Time
Negative - The outline of shutters, bricks and plants have been engraved through black burning. This is a negative burning.
Positive - The cat and fixtures have been burnt onto a light background, making it a positive burning
How Negative Images are Formed in Pyrography
Negative pictures can be formed by using several methods.
The most common are:
1) Burn around a design
2) Depress or engrave, then burn
3) Subtraction - engrave a design through black
Burn Around a Design
Using this method, the area on the outside of the design is burnt dark, making the design stand out in bright contrast.
 Burning around a design
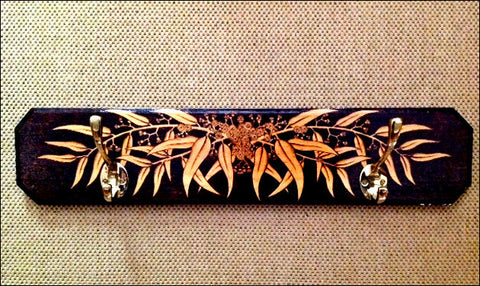 The same method was used on this gumleaf coat rack, except the black area was burnt with a flat shading tip.
.
Depress or Engrave, Then Burn
 Punch Depressions
.
 Burn the Surface to Create the Contrast
.
.
Using this method an area is sunk lower than the burning surface. When the surface is burnt, the sunken valleys remain untouched making them stand out brightly in contrast to the burnt surface. The sunken valleys can be formed in several ways but the two most common are engraving the valley or depressing the valley.
.
 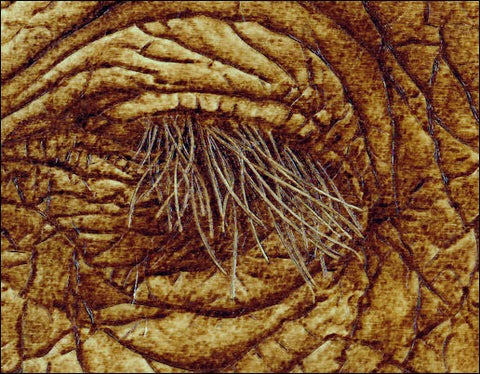 Here, the eyelashes of the elephant were engraved lower than the rest of the burning surface. The texture of the elephant skin was then burnt on top of these valleys, making the eyelashes pop out in start relief.
.
.
Subtraction Method - Engrave a design through black.
   Engaving a design through black
When using this method the surface is first burnt and then the design is created by removing the blackened area and uncovering the natural colour of the timber. There are various methods that can be used to remove the black, but the most common is engraving through the burnt layer with a burr or other mechanical device.
.
 .
Summary
The one thing all of these techniques have in common is that they all have used light coloured timber to allow the viewer to see the greatest contrast possible between dark and light. Negative pyrography opens up a whole new world to the pyrographer. The technique not only showcases a world of high contrasts, but it also imparts a lovely sepia quality of yesteryear. Even though I chose the New York skyline to burn, this concept can be applied to any number of subjects. Imagine your own city lights...or your house...your town...a town in the 30s...an old gas pump at night...lamplights in a park...moonlight on trees on a country lane...the stars in the sky...a bonfire...a camp fire...a canoe and water being lit by moonlight...the eyes of an owl...a cat...Broadway...fireworks...a Christmas tree... Imagine the possibilities!:) After all, we live half our lives in the dark... and now we can burn it. |